
If you follow my blog you know that my old iPhone 4 suffered from the well-known issue of a swollen battery. I didn’t want to throw it away before checking the actual extent of the damage — maybe it could be repaired with little effort?!
So I spent 15 EUR and ordered a Pentalobe screwdriver and plastic opening tools from iFixIt Europe. Only a few days later I received the tools, and using the instructions they have on their website how to open the iPhone 4 and replace the battery it took me only 5 minutes to find out that there was no damage whatsoever to the inner of the iPhone: It was only the battery itself that was damaged (swollen), and the glass back cover that was glued into a plastic frame had become loose.
Here’s a picture of the old battery:
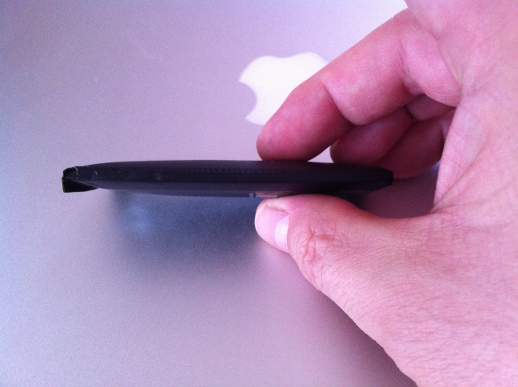
You can clearly see that the battery was not “flat”, but strongly swollen.
Therefore I decided to order a new battery. This time I ordered from eBay since a new battery could be had from there for only 12 EUR, while iFixIt would have charged me 30 EUR (both incl. shipping).
The actual repair was extremely easy: Just unplug the damaged one (after removing a tiny Philips screw that secured the battery plug), and then insert the new one into the iPhone, plugging in the battery cord into its socket, and secure it with the tiny Philips screw.
I also “repaired” the back cover by firmly pressing the glass plate onto the plastic frame. Luckily the glue was still strong enough to firmly hold the glass.
I then assembled the iPhone again, and plugged the charger in. After a couple of seconds, it started booting, and the charging process started, so the new battery seemed to at least not be D. O. A. 🙂
Since I had read comments on Amazon that obviously some people had received used batteries as replacement parts (some had already around 200 charge cycles!), I decided that I wanted to check my battery stats. There’s a tool in Cydia Store called BatteryInfoLite that will display extensive information about your iPhone’s battery, so I decided to jailbreak my phone (that still had iOS 5.0.1 installed) to get Cydia. I used redsn0w 0.9.13dev4, and within only a couple of minutes my device was jailbroken, and Cydia was installed.
Here’s a screenshot of what BatteryInfoLite displayed about my battery:
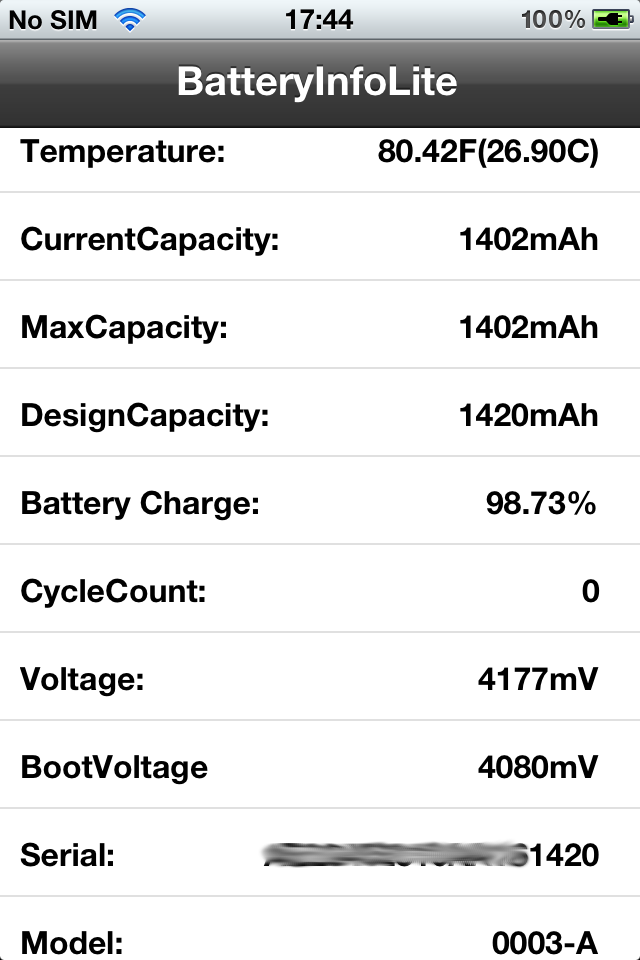
The serial number that was displayed by the tool was identical to the one printed on the battery, which I regard as another indication of reasonable quality. The last 4 digits are obviously an indication of the battery’s design capacity.
I felt happy when the phone was working again. I will now use it as an MP3 player (which it essentially is, after all… ;-))