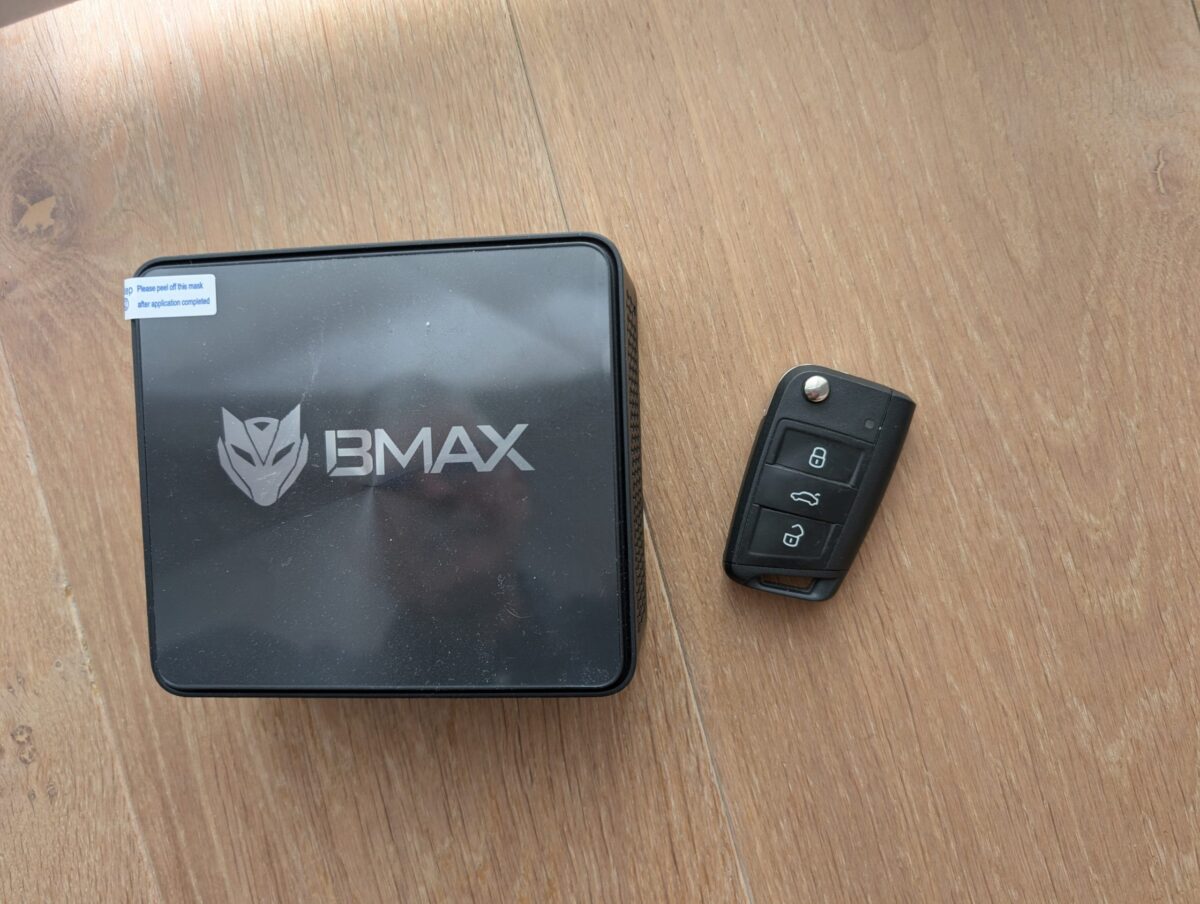
Seit etwa fünf Wochen besitze ich nun meinen ersten “Mini-PC“, einen BMAX B5A Pro, Produktnummer G7R2, nachdem ich bisher immer nur PCs im Standard-Desktop-Format oder im Tower-Gehäuse (Maxi- oder Medi-/Mini-Format) besessen habe, die ich zudem oft selbst gebaut habe. Und ich muss sagen, ich bin begeistert von dem kleinen “Kistchen”.
Warum habe ich mir überhaupt diesen PC gekauft? Ich wollte die Hardware unseres Familien-Intranet-Servers ersetzen, die bisher aus einem alten Dell-Latitude-Laptop bestand. Obwohl dieser ständig nur “idle” läuft, verbraucht er im Durchschnitt etwas mehr als 20 W, was mir einfach zu viel ist. Ein Mini-PC versprach, deutlich weniger Leistung aufzunehmen.
Zum anderen sind meine Ansprüche an die Leistungsfähigkeit eines Intranet-Servers gestiegen, u. a. da ich seit einigen Monaten eine Home Assistant-Instanz auf Docker-Basis betreibe, die zu den bereits bestehenden Anwendungen auf dem Intranet-Server dazu kam. Der Mini-PC verfügt bereits ab Werk über 16 GB RAM (ein Modul mit der Bezeichnung “TDS4CDAG08-32SC22C” des relativ unbekannten Herstellers TWSC, “TechWinSemiConductors”) und eine 500 GB-M.2-SSD (“AirDisk 512GB SSD” des Herstellers “MAXIO Technology (Hangzhou) Ltd.”), was genügend Spielraum für leistungshungrige Anwendungen verspricht. Außerdem ist eine leistungsfähige AMD Ryzen 7 5825U verbaut mit acht Kernen und 16 Threads und einer TDP von lediglich 15(!) Watt.
[According to my own standards, this post about “UEFI booting” was only like 70% “ready” — I had it pending in “draft” state for many months, because I was lacking the time to finish it… I now decided to release it in its current state, simply because I believe it will still be very useful to many people interested in the topic…]
Before we actually dive deep into how UEFI booting works, a short and simple introduction is due.
Introduction
What is UEFI, anyway?
UEFI could be called the successor of the old BIOS concept. It is a unified version and successor of “EFI”, which was an architecture for a platform firmware used to boot operating systems (in the following abbreviated as “OS”), and the corresponding interface to interact with the firmware and the operating system.
The advantages of UEFI over the traditional BIOS are, among others, the following:
Boot disks with large partitions (over 2 TB), using GUID partitioning (GPT),
network capabilities already in pre-OS phase, and
modular design.
Boot Mechanism
So, how does booting with UEFI work?
When you enter your UEFI, you will find a user interface that shows all devices that have been detected, and that support booting. Usually that includes all your hard drives.
You can freely define a desired boot order (regardless of hardware paths, i.e. the way your drives are connected, be it via an SATA port, be it via an NVME slot), i. e. the primary OS that should be booted, if that fails the next OS that should be tried, etc. That’s called your “boot configuration”, and it resides in your motherboard’s NVRAM. (a concept that’s basically the successor of what used to be called “CMOS” in the old days of the BIOS). More specifically, we speak about “UEFI Variables“, which allow the OS and the firmware to interact.
When UEFI’s Firmware Boot Manager wants to boot an OS, it first needs to load something called the OS “Boot Manager.” Common OS boot managers are:
BOOTMGFW.EFI used to load Windows, or
SHIMX64.EFI used to load Linux
The OS boot manager is located on the “EFI system partition” (ESP). This is a small partition (usually only a few 100 M) at the start of your hard drive, formatted with basically a FAT filesystem. FAT is a very simple filesystem, so that the code to parse it and load files from it can be reasonably small and fit into a boot firmware.
A typical disk layout for a Windows installation may look as follows:
UEFI /EFI System Partition as seen under Windows
The first partition is the ESP, then comes the Windows boot and system drive (with a drive letter of C:), and then comes the recovery partition.
Apart from boot loaders, the ESP can contain kernel images or (device) drivers, e. g. to support hardware that must be initialized prior to the start of the OS, or to give access to a complex filesystem that holds the actual OS to be booted.
Depending on which OS you want to boot, the OS boot manager then loads
in the case of Linux: the OS kernel, and the kernel in turn loads the OS, or
in the case of Windows: the Windows Boot Loader (\Windows\system32\winload.efi)
Boot Configuration Details
Now that we got a good overview of the mechanism as a whole, let’s dive into the details. Let’s look at the boot configuration of my machine. To do so, invoke the below command (I did it under Ubuntu 23.04, but it should work the same under any reasonably current Linux distro where the tool is installed):
So, what does the above tell us? First, we see that “(Boot)0003” is the boot entry used to start the currently running system. Secondly, the order in which boot is tried is 0000, 0002, and then 0003. So by default, Windows (by the “Windows Boot Manager”) will be booted. Then we see the three boot entries. The star/asterisk (*) after the boot entry shows that all these entries are “active.”
What about the remaining info in the above command output? Immediately after the boot entry, we see the names that are also displayed on screen by the Firmware Boot Manager (“Windows Boot Manager” and two times “ubuntu”). We then see references to the ESPs used to boot these OS.
HD obviously means “hard drive”, then we see a 1 which refers to the first partition on the respective drive, then we see GPT which refers to the partitioning table format, and then we see a UUID. To find the respective partitions, we can use the below command:
The PARTUUID values in the above output match the UUIDs in the boot configuration as shown by efibootmgr. So, the ESPs are located by searching for the partitions’ UUIDs. That means that you can replug your drives to different ports, or even copy partitions to different drives, and the UEFI boot mechanism will still find them. That’s a nice and very stable design.
UEFI User Interface
Now, let’s enter the UEFI and look at some of the details there. My PC’s motherboard is an MSI, and to enter the UEFI I need to press “F2” after the beep when powering on the PC (from “off” state, not when suspended to RAM, i.e. “sleeping”!) or restarting it.
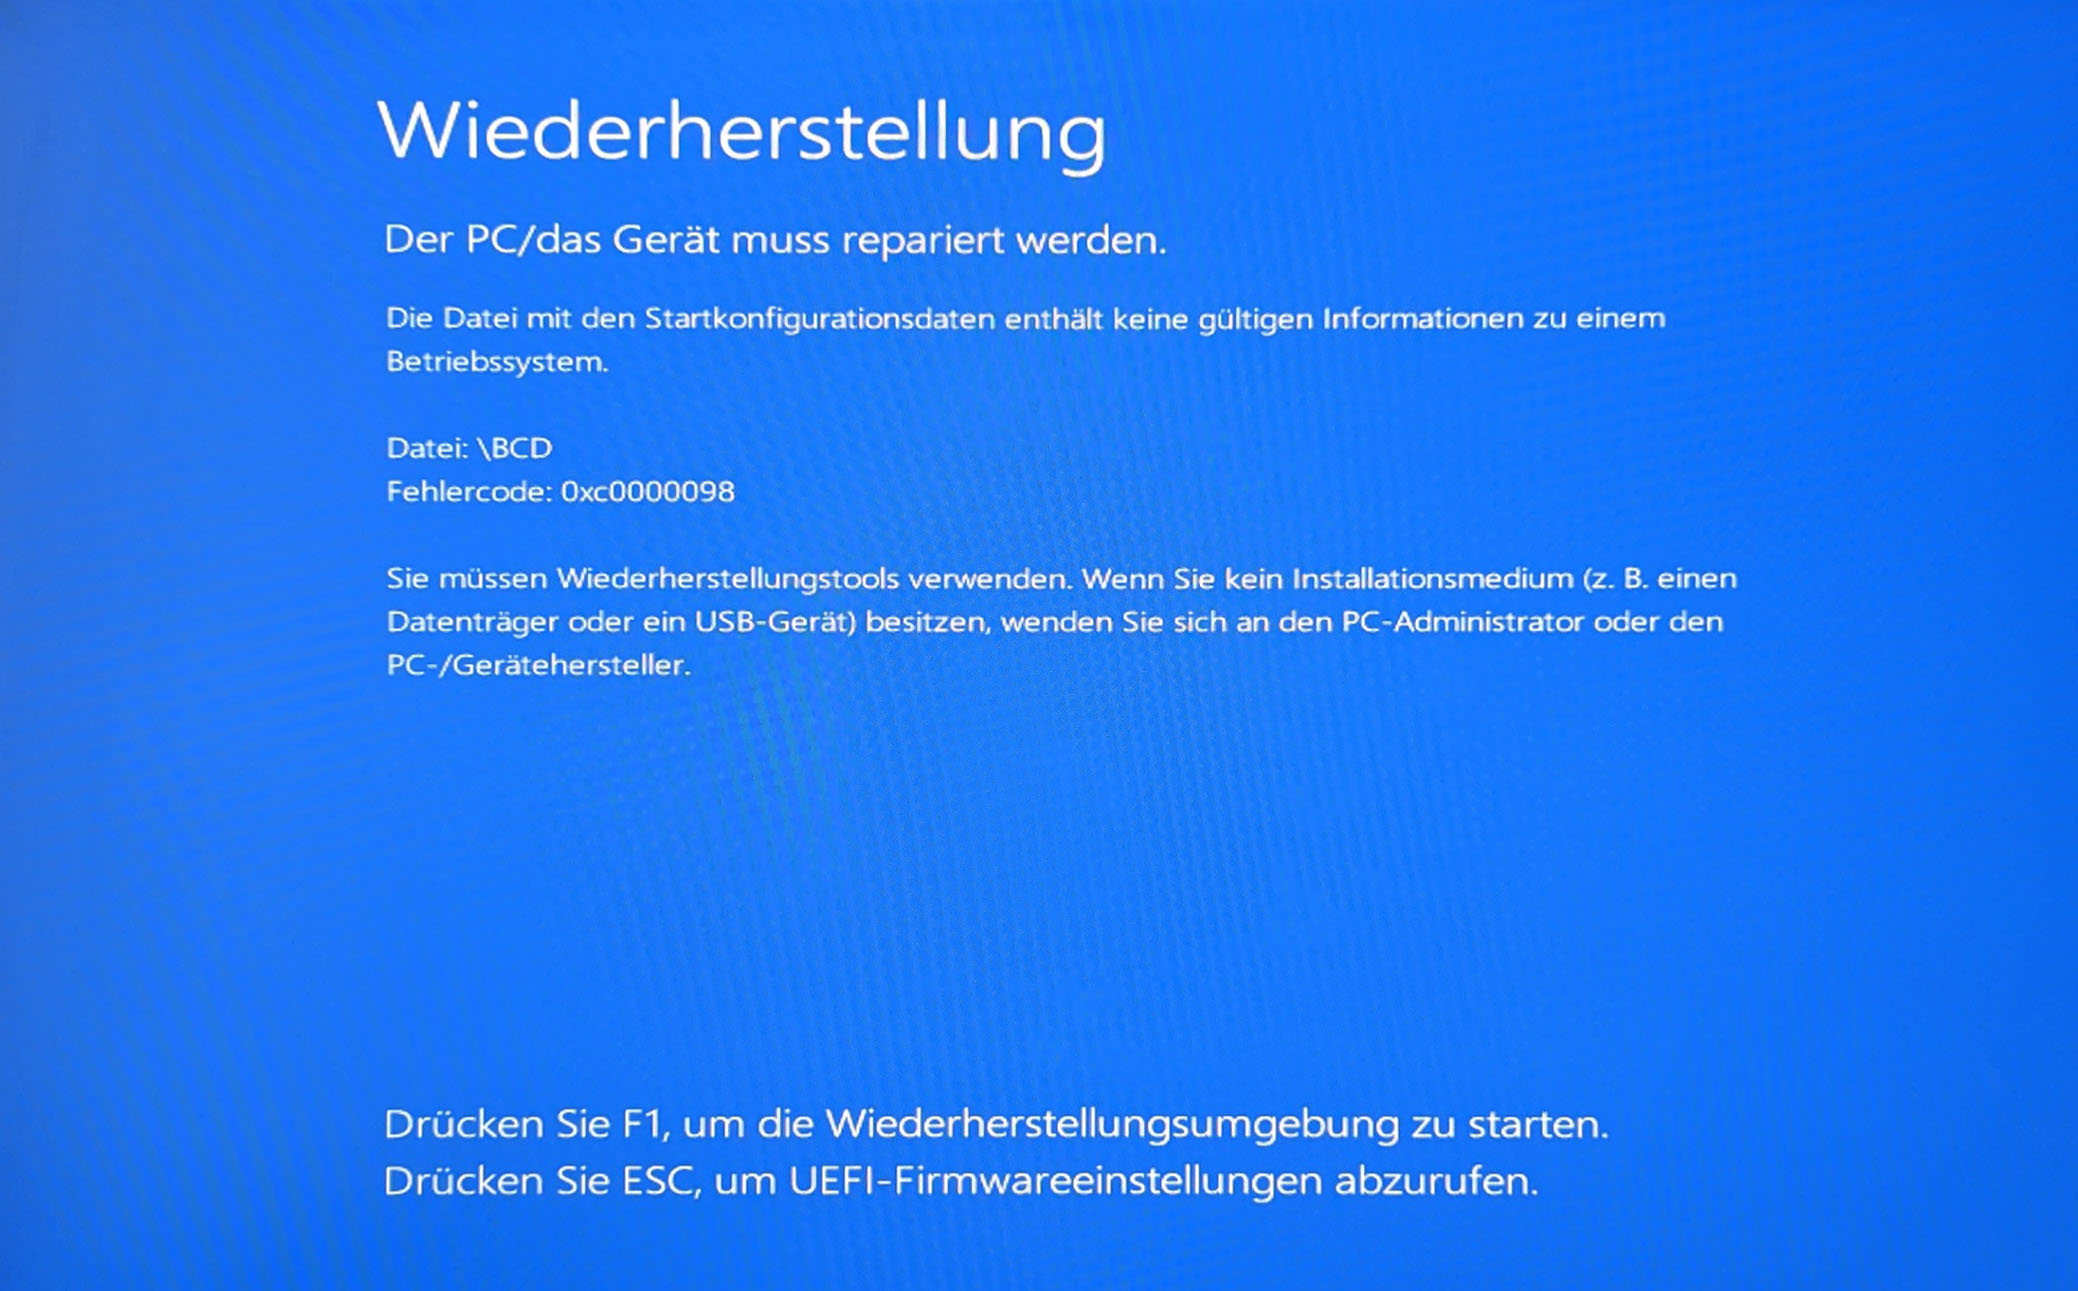
I recently had a mishap where on a system that I had just upgraded from Windows 10 to Windows 11 the Windows BCD Store (Boot Configuration Data Store) was suddenly messed up, presumably by a patch update I had taken earlier:
Blue screen showing “Wiederherstellung: Der PC muss repariert werden.” (German for: “Recovery: The PC must be repaired.”), hinting to a problem with the Windows BCD Store.
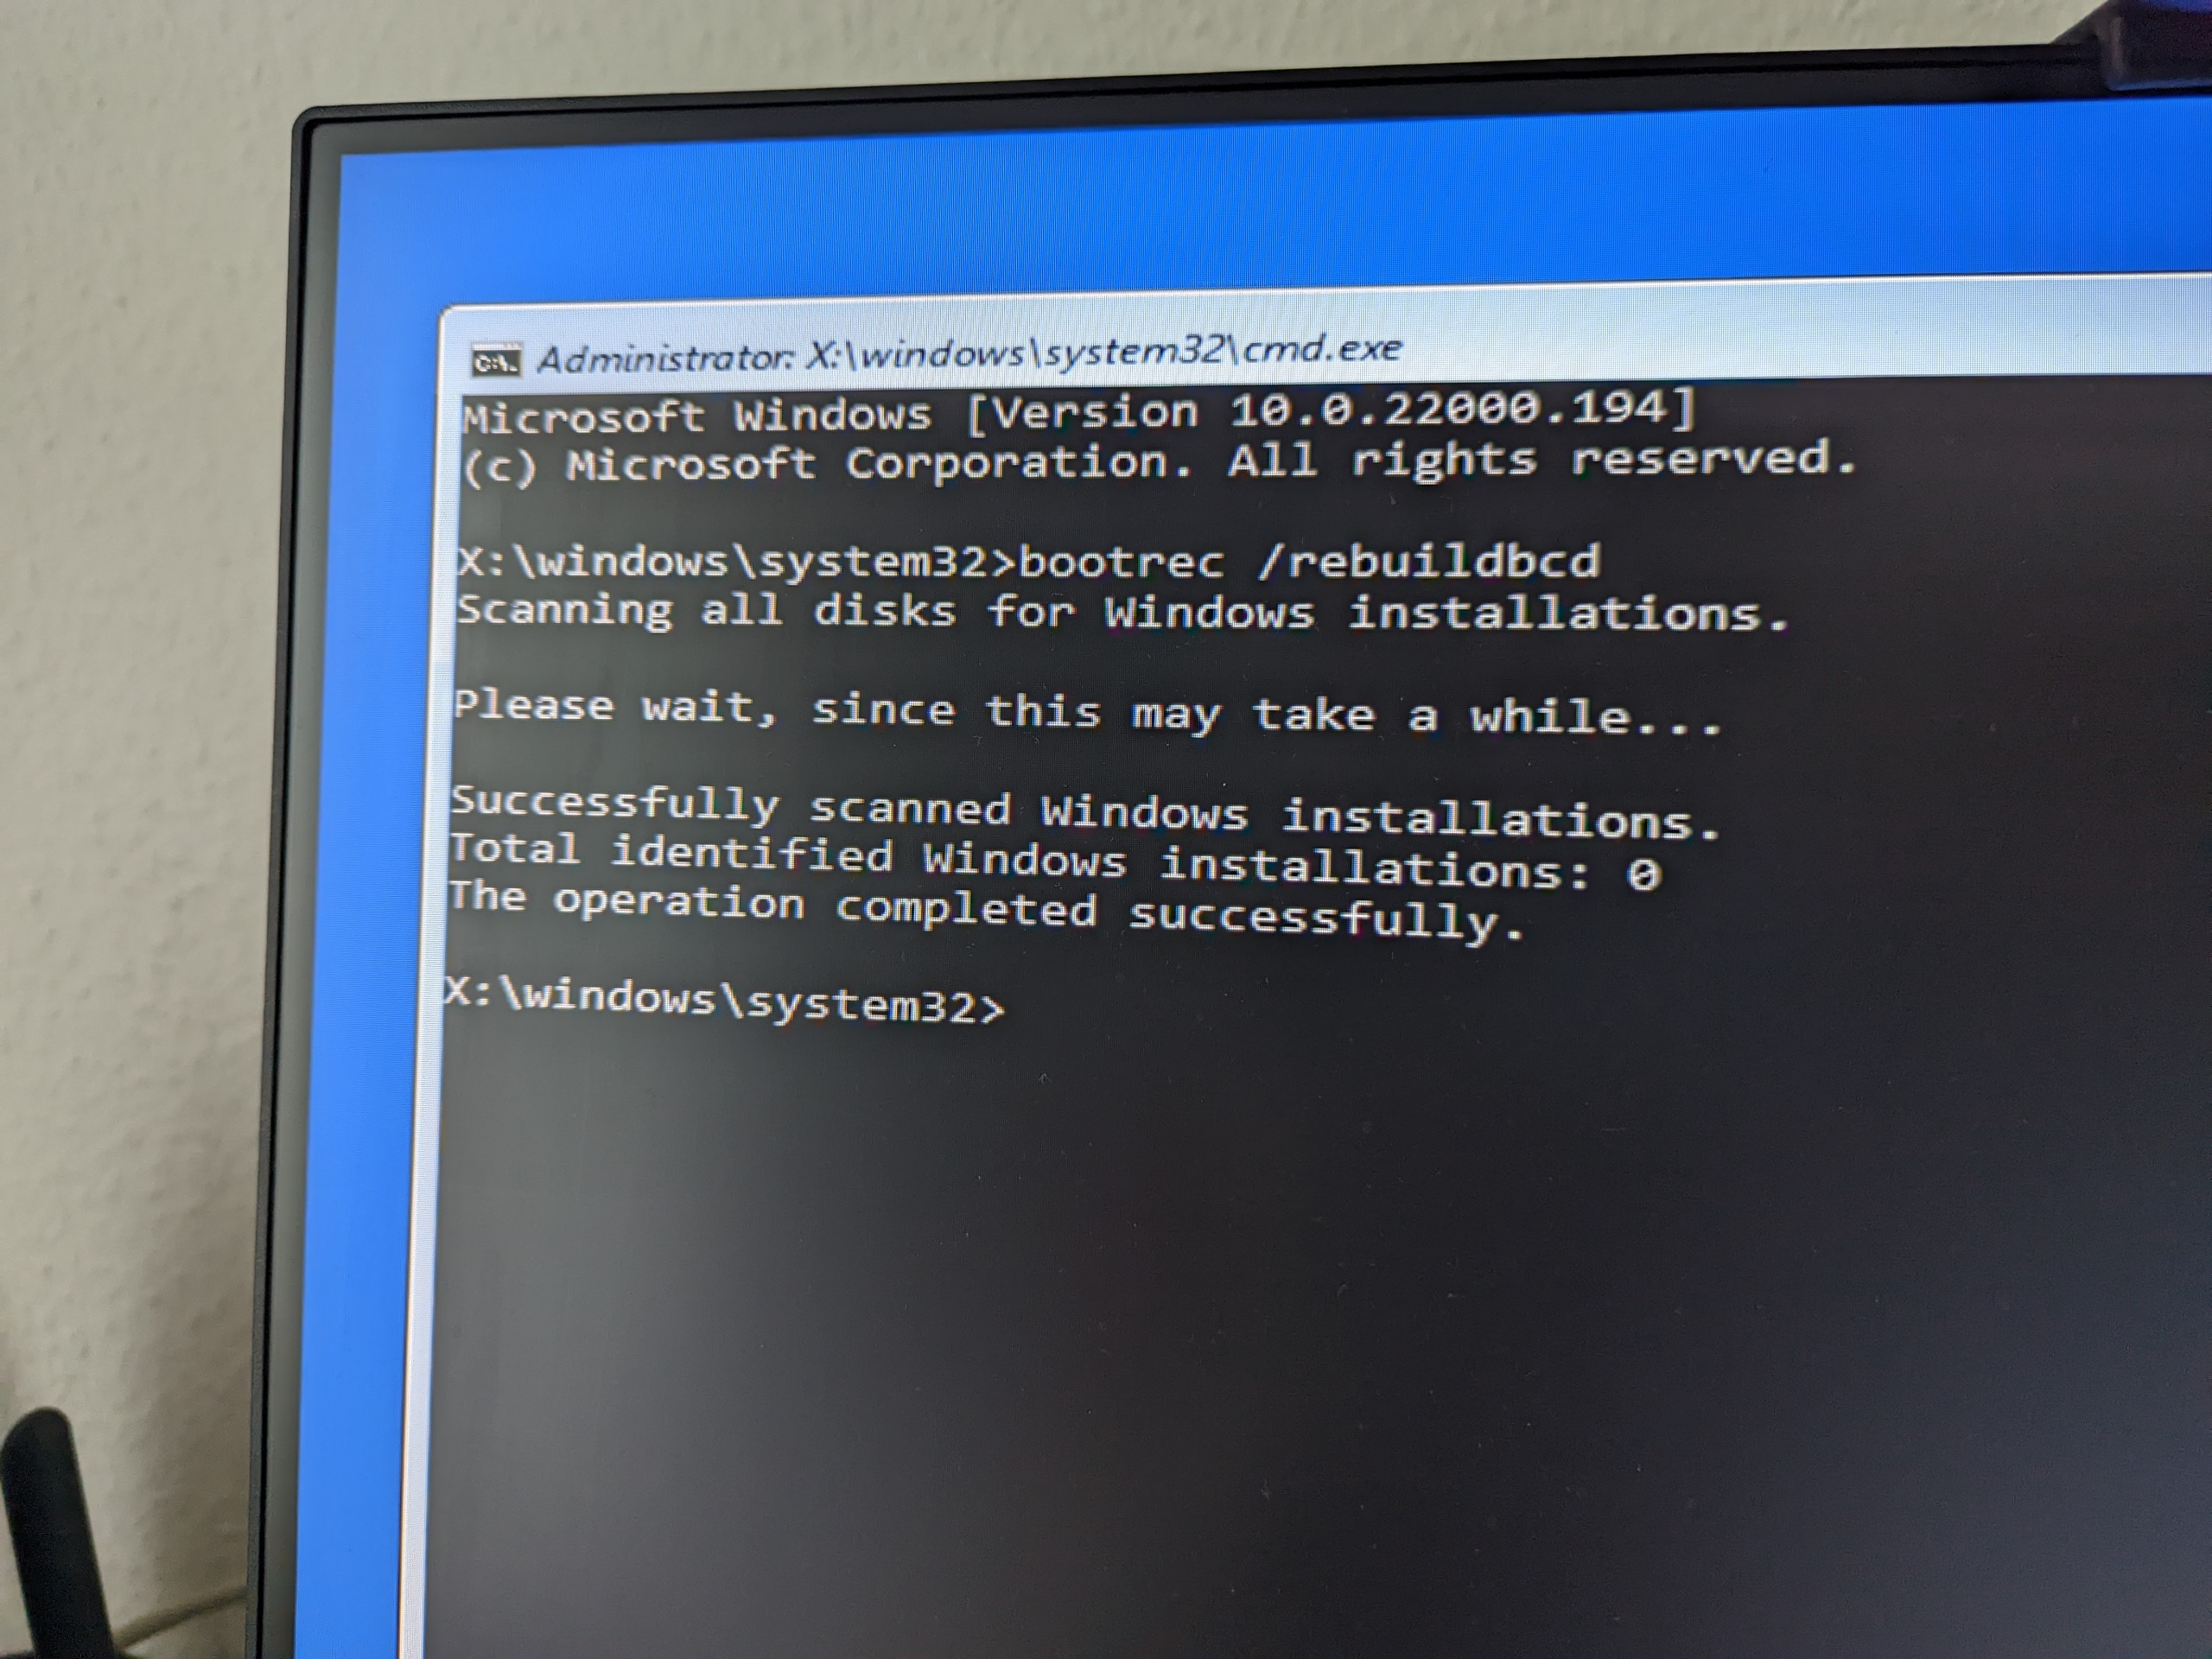
But what if the scan for all Windows installation turns out not to identify yours?! Like in the below photo?
Photo of a Windows RE session, failing to automatically rebuild the Windows BCD Store
Are you SOL then?
Don’t despair.
The solution is actually quite simple. Other than the above which is supposed to be fully automatic, it involves some manual tasks, but it should be quite easy if you are at least a bit tech-savvy.
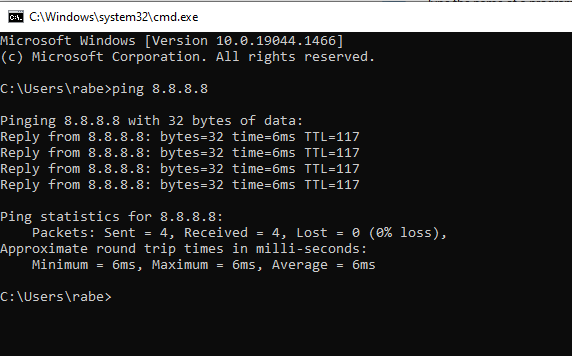
Diesen Hilfeschrei hat bestimmt jeder schon oft gehört. Aber nur die wenigsten wissen, wie man heraus finden kann, wo genau das Problem liegt.
Ich versuche in diesem Blogpost einmal, eine auch für Laien verständliche bzw. leicht anwendbare Anleitung zu liefern, wie man bei Internetstörungen zu Hause dem Problem auf die Spur kommen kann…
Zunächst einmal ein paar (wenige) Grundlagen. Ohne diese geht es einfach nicht.
Egal, was Sie im Internet tun, alles passiert auf Basis sogenannter “IP-Pakete“. Jeglicher Datenverkehr wird “zerhackt” und in Form von kleinen “Häppchen”, eben dieser IP-Pakete übertragen. Alle Geräte, die am Internet teilnehmen, haben eine bestimmte Rolle. Ihr Handy, Laptop oder PC ist in der Regel ein sogenannter “Client“, also ein “Kunde”, die Dienste, die Sie in Anspruch nehmen, werden durch sogenannte “Server” (“Bediener”) erbracht. Wie findet nun Ihr Client den passenden Server? Das funktioniert über ein System namens “DNS“. Es übersetzt für den Menschen lesbare Adressen, wie z. B. “amazon.de“, in IP-Adressen, die Ihr Endgerät für die tatsächliche Kommunikation mit dem gewünschten Dienst benutzt.
Wie werden aber die IP-Pakete zwischen Ihrem Endgerät (Handy, Laptop, Tablet, PC) und den Servern im Internet übertragen? Zunächst muss Ihr Endgerät mit Ihrem eigenen lokalen Netzwerk (auch “LAN” genannt) bei sich zu Hause verbunden sein. Dies kann über WLAN (auch “WiFi” genannt) oder Netzwerkkabel (auch “Ethernet”-Kabel genannt) passieren. Von dort geht es über Ihren Router zu Ihrem Internetprovider, und dann von dort ins Internet. Welche physikalische Verbindungstechnik (Teilnehmeranschlussleitung) Sie zur Anbindung an Ihren Provider verwenden ist grundsätzlich egal: DSL, TV-Kabel, Glasfaser oder sogar Mobilfunk (z. B. über einen Vodafone GigaCube).
Since I have Windows 10 on my PC, I have a very annoying behavior, namely that Windows wakes up from sleep in the middle of the night to perform a reboot to install updates.
There is many “hacks” on the Internet how to disable this, but the only “proper” way seems to be by defining a Group Policy:
Run Group Policy Editor: gpedit.msc
Open branch Computer Configuration\Administrative Templates\Windows Components\Windows Update\
Set node Enabling Windows Update Power Management to automatically wake up the system to install scheduled updates to Disabled
This should stop your PC from resuming from sleep to install updates.
A lot of people use Bitlocker for full-disk encryption of their hard drives. For extra security you might want to be prompted for a PIN when you unlock your hard drive, because allowing attackers to boot your system without authentication might open up extra attack vectors. Setting a PIN can be easily accomplised if you know how… 🙂
The below instructions are exact for Windows 10, but they are very similar in Windows 7, too.
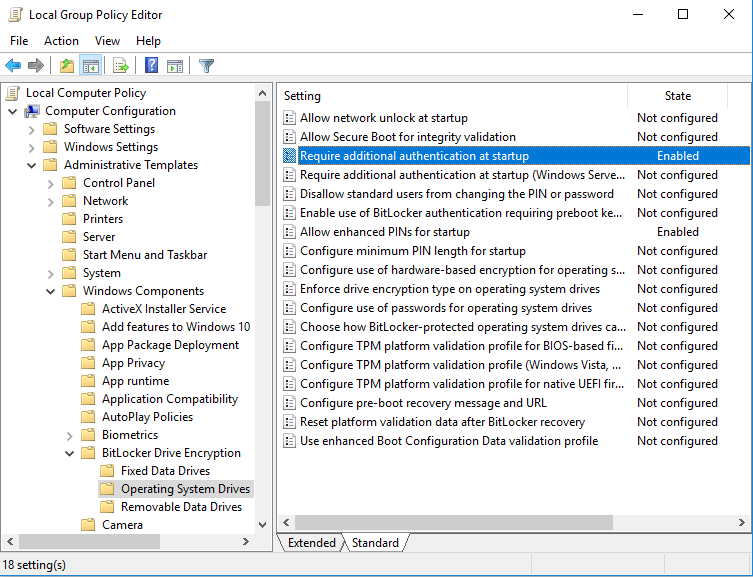
Launch the Local Group Policy Editor by typing gpedit.msc into your Windows search, then when it has been found right-click on it and select Run as administrator from the pop-up menu. Then maneuver to the following path in the left “folder” pane:
Local Computer Policy > Computer Configuration > Administrative Templates > Windows Components > Bitlocker Drive Encryption > Operating System Drives.
This is what it looks like if you did it correctly:
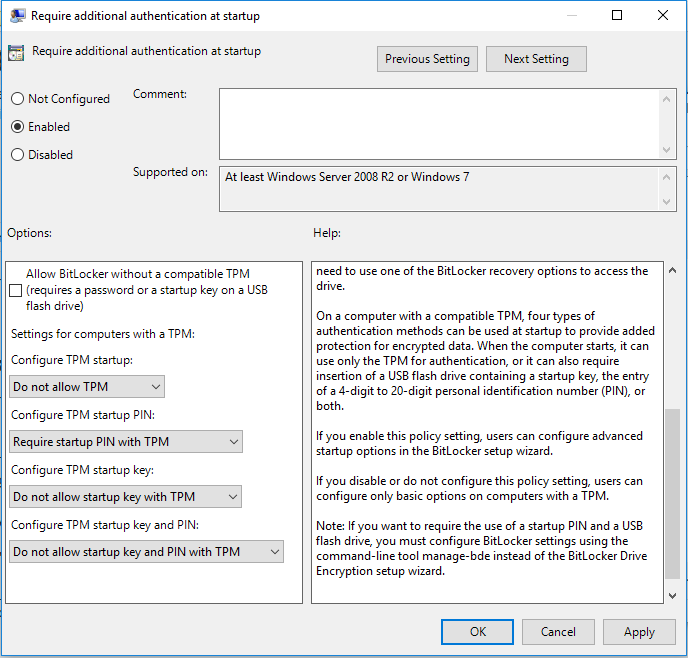
Then double-click on the setting Require additional authentication at startup, and you see the following dialog:
Now change option Configure TPM startup PIN to read:
Require startup PIN with TPM
Then reboot. Now you can right-click on your system drive and select Set Bitlocker PIN or Change Bitlocker PIN (I forgot to take a screenshot of this last step, so I’m not 100% how exactly this looked like, but it should be obvious) from the pop-up menu.
If your laptop has been set up to use Bitlocker, by your company or yourself, you should be very cautious when playing with your BIOS settings.
Bitlocker considers BIOS settings changes a potential security breach, as somebody could e. g. change boot order to boot from an external media to try to fiddle with the boot mechanism set up on your hard drive or SSD. This is why when you change something in the BIOS or just boot from an external drive, such as a thumb stick, Bitlocker will prompt you for your recovery code.
The Solution
To prevent this you just have to disable the so-called “protector” for your boot drive. Only then should you change BIOS settings or boot from a drive other than your normal boot drive.
You do so using the manage-bde tool which is part of Windows:
manage-bde –protectors –disable <Drive>
Don’t forget to re-enable the protector after you’re done:
manage-bde –protectors –enable <Drive>
If this helped, I’d appreciate a comment from you here on my blog.
I usually prefer to use English versions of all operating systems and applications I use — simply because the German translations are usually horrible, plus very often updates for English versions become available much earlier (if at all!) than for localized versions.
Now I just bought myself Office 2010 and found that it lacked proofing tools for German — call me naive but I expected that these “common” tools were available in all or at least major languages. Duh! 🙁
So what I did is to download the German office installation package from Microsoft and started SETUP.EXE. To my surprise adding German as a proofing language was simpler than I even thought. After a while Setup properly showed me
all the components I had already installed,
the language English I had installed, plus
German as an optional (UI!) language to install, and
in the packages section another German proofing tools package appeared that I could then install.
Maybe the above is obvious to all or most of you, but I thought it’s not exactly that so I’d create a post about it to help people who are in the same situation as I was.
Suddenly my brand-new, only a couple of days old Windows 7 installation had an odd problem: After a system boot or restart, networking would be broken in a way that hosts in the Internet could not be reached.
I investigated the problem and noticed that my Ethernet adapter had two default gateways assigned, while the first was 0.0.0.0:
I googled for this problem and found some hint that pointed toward’s Apple’s Bonjour service. Supposedly it sometimes starts up before networking is fully up, and in consequence assigns the invalid default gateway. The advice given there to solve the problem was to completely disable this service.
While I currently don’t need this service, I didn’t want to use this “brutal” approach, so what I did was switch the service to start up as Automatic (Delayed Start) as opposed to Automatic (which causes the service to start as early as possible).
And this indeed did the trick — I don’t have these annoying networking problems anymore. 🙂
Update: To correct the name in the “Services” application which will often be Id_String2.6844F930_1628_4223_B5CC_5BB94B879762 you can use a command sequence as follows (your path to mDNSResponder.exe may vary):
Here’s another Cisco VPN client nightmare for you:
The old 4.9.x.x Cisco VPN client does’t run under Vista anymore. So I downloaded the most current version our organization has available, 5.0.05.290. I started the installer and pretty quickly received an error message that simply said: “Internal Error 2738″.
I thought maybe the install file was corrupt, so I redownloaded it — same error.
Now I read the readme file (which I normally don’t do ;-)) It said you need a Microsoft hotfix in order to be able to install the VPN client. So I downloaded that one as well and retried the installation after rebooting the machine — same error message agin.
Damn!
So I googled for this problem and quickly came across this website — which indeed fixed the problem for me.
Thanks, Microsoft, for making such a lousy job of not registering said DLL. And thanks, Cisco, for not pointing your customers to this problem.
Gaaaawd, how I hate monopolies…
We use cookies on our website to give you the most relevant experience by remembering your preferences and repeat visits. By clicking “Accept”, you consent to the use of ALL the cookies.
This website uses cookies to improve your experience while you navigate through the website. Out of these, the cookies that are categorized as necessary are stored on your browser as they are essential for the working of basic functionalities of the website. We also use third-party cookies that help us analyze and understand how you use this website. These cookies will be stored in your browser only with your consent. You also have the option to opt-out of these cookies. But opting out of some of these cookies may affect your browsing experience.
Necessary cookies are absolutely essential for the website to function properly. These cookies ensure basic functionalities and security features of the website, anonymously.
Cookie
Duration
Description
cookielawinfo-checbox-analytics
11 months
This cookie is set by GDPR Cookie Consent plugin. The cookie is used to store the user consent for the cookies in the category "Analytics".
cookielawinfo-checbox-functional
11 months
The cookie is set by GDPR cookie consent to record the user consent for the cookies in the category "Functional".
cookielawinfo-checbox-others
11 months
This cookie is set by GDPR Cookie Consent plugin. The cookie is used to store the user consent for the cookies in the category "Other.
cookielawinfo-checkbox-necessary
11 months
This cookie is set by GDPR Cookie Consent plugin. The cookies is used to store the user consent for the cookies in the category "Necessary".
cookielawinfo-checkbox-performance
11 months
This cookie is set by GDPR Cookie Consent plugin. The cookie is used to store the user consent for the cookies in the category "Performance".
viewed_cookie_policy
11 months
The cookie is set by the GDPR Cookie Consent plugin and is used to store whether or not user has consented to the use of cookies. It does not store any personal data.
Functional cookies help to perform certain functionalities like sharing the content of the website on social media platforms, collect feedbacks, and other third-party features.
Performance cookies are used to understand and analyze the key performance indexes of the website which helps in delivering a better user experience for the visitors.
Analytical cookies are used to understand how visitors interact with the website. These cookies help provide information on metrics the number of visitors, bounce rate, traffic source, etc.
Advertisement cookies are used to provide visitors with relevant ads and marketing campaigns. These cookies track visitors across websites and collect information to provide customized ads.